Tuesday, December 11, 2012

Creating a new application in Endeca with you own data


Following steps describe the details about creating a new application with a new data (other than sample wine data) and deploying to Endeca. It also gives information about the tutorial which need to be followed to help you understand the basic learning process for Endeca.

Note: Following Endeca packages should be installed first:

- MDEX Engine  -
- Platform Services
- Endeca Workbench
- Endeca Deployment package.
- Endeca Developer Studio

Read Endeca Concepts Guide to get a basic understanding of what the above packages mean and to understand the terminology used in Endeca.

Step 1: Use the deployment template to create the folder structure and required information to provision the new application.
a. Run the initialize file under the path C:\Endeca\Solutions\deploymentTemplate-3.1\bin  (Check the directory path of the deployment template)
b. Follow the instructions. Application name specified in this step will be used in the Developer Studio when creating the scripts for the data foundry (ITL process)
Note: You can create as many application as you need with unquie ports of the dgraph and the log server. The EAC and workbench ports remain the same. Additional information Read: DeploymentTemplateUsageGuide.pdf, Chapter 2: Deploying an EAC application on Windows

This would have created a directory structure to store the files required for Endeca. Examine the folders. Most important you will need to look
C:\Endeca\APPS\MyApp\config\pipeline   - Will contaon the scripts used in the ITL process. You will see the Sample Wine data scripts, which you replace later.
C:\Endeca\APPS\MyApp\test_data\baseline - Contains the data which will be loaded into Endeca. You will see sample wine data, which you can replace with your own data.

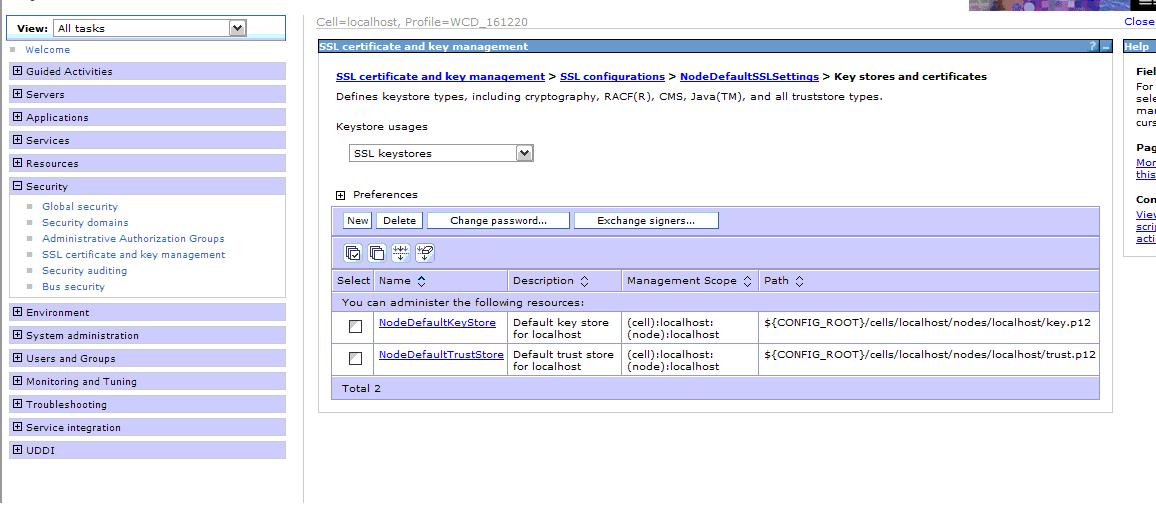
Step 2: Run the initialize_services.bat under the folder C:\Endeca\APPS\MyApp\control. This would initialize the application, you will now be able to see the application in the Endeca IAP Workbench (http://localhost:8006) > EAC Administration -> Admin Console.
This will ensure that you have successfully provisioned the application in Endeca. You will now need data to be loaded into the application.

Step 3: If you want the use the Sample wine data. Run following two commands.
load_baseline_test_data.bat  - Will copy the data from C:\Endeca\APPS\MyApp\test_data\baseline to C:\Endeca\APPS\MyApp\data\incoming
baseline_update.bat - Process the data and loads it into MDEX engine for use from the application.

If you want to process a different data set of you project:

a. copy the data(a zip or any file) into C:\Endeca\APPS\MyApp\test_data\baseline.
b. Open Endeca Developer Studio and create a new project (note project name should be same as the application name provided in the step 2). In this case MyApp.
c. Following the Endeca Dev Studio document, Chapter 3: Preparing Data, Properties, and Dimensions. This will help you create the pipeline which will be used by Endeca ITL process to prepare your data and load into MDEX engine.
d. Copy the files created by Endeca Developer Studio into C:\Endeca\APPS\MyApp\config\pipeline folder.  Note most of the files name start with name MyApp, the name you provided during application creation.
e. Now run load_baseline_test_data.bat and baseline_update.bat.
f. Access the Endeca Reference application http://localhost:8006/endeca_jspref. Host: localhost, Port is that of DGraph provided in the Step 1.
g. You will see the processed data in the endeca reference application.

Documents to read to learn about Endeca
Here are some of the documents you can refer to learn more about endeca. Based on your role  or interests choose the documents you want to read and understand.

Doc 1: Basics Concepts of Endeca - Basic terminology used in Endeca.
Doc 2: Developer Studio Guide - If you want to work on creating the pipeline, properties, dimension and configure other search related features.
Doc 3: Forge Guide - To understand the Endeca Information Transformation Layer, a follow-on guide to Doc 2:.
Doc 4: Deployment Template - To understand the Endeca deployment concepts.
Doc 5: Search Developer Basic  - To understand the API details to query the MDEX Engine.
Doc 6: Advanced Development Guide - To understand the wild card search, auto correct, did you mean, phrase search, thesaurus. 


Wednesday, September 19, 2012

Order Management Module - Different ways of invoking functionality

With WebSphere Commerce feature pack 4 onward,  we now have three variations of invoking the Order Management URL's. Lets look at each of them and when and how to use them considering the performance.

1. Struts Actions invoking WebSphere Commerce Command.
Invoke the struts Action configured to a Websphere commerce command, either using the HTTP/HTTPS and passing the request parameters using a GET or a POST method.

Ex: OrderItemAdd action invoking the OrderItemAdd command.

        <action
            parameter="com.ibm.commerce.orderitems.commands.OrderItemAddCmd"
            path="/OrderItemAdd" type="com.ibm.commerce.struts.BaseAction">
            <set-property property="https" value="0:1"/>
            <set-property property="authenticate" value="0:0"/>
        </action>

       Request:  https://localhost/....../OrderItemAdd?catEntryId-123&<otherparameters>

Here the request parameters are passed from a browser or a any client as name/value pair and processed directly by the OrderItemAdd command, well of course there can be struts validator framework validating the parameter being passed. 

2. SOI Actions invoking the SOI client and the Commerce Command

Invoke the SOI action configured in struts, which will further invoke the SOI client and then pass it on to the Commerce Command.

Ex: AjaxOrderChangeServiceItemAdd invoking the Component Service

        <action parameter="order.addOrderItem" path="/AjaxOrderChangeServiceItemAdd"                                                type="com.ibm.commerce.struts.AjaxComponentServiceAction">
<set-property property="authenticate" value="0:0"/>
<set-property property="https" value="0:1"/>
</action>

This action if invoked from a browser passing the name-value pair parameters, will convert them to OAGIS message first, then converts back into name-value pair and invokes the OrderItemAddCmd. So there is a additional conversion of name-value pair to OAGIS message and then back to name/value pair, as the OrderItemCmd will only understand this format. 

If invoked from browsers, this could have negative impact on the performance of Order management functionality.

This can be used if the client needs to pass the OAGIS message format into the Websphere Commerce Server.

3. REST services introduced in FEP4.

Invoke the struts action and pass the request as JSON. 

Ex: POST /wcs/resources/store/10101/cart HTTP/1.1
Host: localhost
Content-Type: application/json

{
   "orderItem": [
      {
         "productId": "10541",
         "quantity": "2.0",
         "itemAttributes": [
          {
           "attrName": "10297",
           "attrValue": "4T"
          }
         ] 
      },
      {
         "productId": "10823",
         "quantity": "3.0"
      },
      {
         "productId": "10260",
         "quantity": "1.0"
      }
   ]      
}

Here the request is first interpreted by the REST webservice, which converts the JSON string into a Map of name/value pairs and then invokes the SOI service of OrderManagement (section 2 above), then further processing by SOI and the return response is converted back into JSON.

With REST, we now have two more conversions one from JSON to name/value pair, then name/value pair to OAGIS message, then OAGIS to name/value pair.

JSON is very well used format for AJAX requests and for exposing Restful services, but do we need two level of conversion before the request is actually process. 

Friday, September 14, 2012

Importing Database Dump into Oracle - For local Development Box

One of the most important steps to have a healthy and accurate development and unit testing on local machines is to have most accurate data as similar as the data on TEST or Stage environments. Importing the data on to local database installations has be a regular activity preferably once for iteration or a release. 

This section explains the process of importing the oracle data dumps on to the local environment.
Assumptions: Data has been exported into .dmp format with all the tables in it, well yes some of  PII data need not be dumped as is, but should be altered to make all passwords the same, email id to be changed and address information to be changed to read same values. Alternatively have only non PII data dump or use no rows option when dumping PII tables. This article talks about approaches of importing a full or clean dump and a partial dump.

First lets look at the partial dump, this is the most easy of all and single command will be able to fulfill the need.

Step 1: Identify the directory where you want the dump file to reside.               
                      select * from ALL_DIRECTORIES; 
This will give you the list of all directories mapped in Oracle. Identify the directory used by your schema. Copy the .dmp file to the directory_path location on your system.

Step 2: Run the impdp utility.

                        impdp system/<password> directory=<directory name from step1 query> dumpfile=<dump file name> logfile=<log file name> PARALLEL=8 CONTENT=ALL TABLE_EXISTS=REPLACE

Here TABLE_EXISTS=REPLACE, will replace your local table with that one from dump.

This will take some time depending on the size of the data being imported.

Now to do a clean import or to create a new schema, following steps would be required.

Step 1: Collect the required information

  • Directory to dump the file. Your dump file should in path returned by the query.
              select * from ALL_DIRECTORIES  -- get the directory name and path
  • Get the tablespace name used by your schema. Following queries will help you identify the tablespace used by your schema (schema is same as the user name in oracle)
              Select tablespace_name from dba_tablespaces;  -- This will fetch all table spaces used in Oracle.
               Select tablespace_name from all_table where table_name = '<your table name>'; -- This will fetch the table spaces used by your specific table.

  • Get the datafile location on the filesystem (although you won't be able to use the same tablespace file name again, but you can use the same path. Once you have successfully imported the database you can delete the old files)
                  select tablespace_name,file_name from dba_data_files;

 From the above queries get the tablespace name for your data and index, if proper naming convention has been used, it could be something like <schemanameDATA> and <schemanameINDX>.

Step 2: Drop tablespaces
            drop tablespace <schemanameDATA> including contents and datafiles;
            drop tablescpace <schemanameINDX> including contents and datafiles;

Step 3: Create the Tablespaces (Datafile location based on step 1, third query)


          create tablespace <tablespace name for data> datafile '<DATAFILE NAME INCLUDING LOCATION>' size           2g reuse autoextend on;
          create tablespace <tablespace name for index> datafile '<DATAFILE NAME INCLUDING LOCATION>' size 2g reuse autoextend on;


Set the size as you require, 2g is 2 Giga bytes.

Step 4: Drop the user
           drop user <schemaname/username> cascade;

Step 5: Create the user and required permissions
           create user <schemaname> identified by <password> default tablespace <tablespace name for data> temporary tablespace temp quota unlimited on <tablespace name for data> quota unlimited 
 on <tablespace name for index>

           grant connect,resource,create materialized view to <schema name>;

           grant connect,resource,create materialized view to comusr

           grant create view to <schema name>;

           grant create synonym to <schema name>;

Step 6: Now logout of the sqlplus. At the command prompt run the following command

          impdp <oracle_admin_user>/<password> full=Y directory=<directory name> dumpfile=<dumpfilename> logfile=<logfilename> REMAP_SCHEMA=<schema name of the export>:<schema name of import> CONTENT=ALL
             
          Directory Name - is the name identified in Step 1, first query

          REMAP_SCHEMA - is required if the original schema of the export is not the same as the schema into which you are importing.

If you need to create a new schema, you will follow Step 1, Step 3, Step 5, Step 6.

Note: Please ensure that your extracted dump file has entire schema, if any of the tables are excluded during the data dump creation, your database will have those table missing.
 

Saturday, June 9, 2012

Making events asynchronous

All events in websphere commerce are synchronous events by default. Sometimes it is essential to make the events asynchronous to ensure guest is not waiting for the events to complete. For Example, if you are transferring orders to back end system, it can be handled as asynchronous. 

To make the events asynchronous add the priority attribute to the event in wc-server.xml

<component    compClassName="com.ibm.commerce.event.impl.ECEventEnableComponent"
          enable="true" name="OrderSubmit Event" priority="LOW">
            <property display="false">
                <event name="OrderSubmit"/>
            </property>
        </component>


Priority can take 3 values, HIGH, MEDIUM, LOW

HIGH - Will make it synchronous and will run in the same transaction as the event initiator.
MEDIUM - Will make it asynchronous and immediately picked by the event listener. 
LOW - Will run with slight delay as per the scheduler run time and will be processed in a different transaction.

Tuesday, June 28, 2011

Websphere commerce scheduler

In Websphere Commerce we can configure two types of scheduler:
a. Regular Schedulers: Which are scheduled to run after a specific interval. Ex: Sync the inventory into database from an external system. Send orders to a external systems etc.
b. Broadcast Jobs: Which are run once on all instances in the cluster. Ex: Refresh registry on each instance.

Tables used for storing scheduler information:
SCHCONFIG: Stores the configuration of a scheduler, if the scheduler is a broadcast or a default, the frequency and the interval.
SCHACTIVE: Stores the status of the scheduled job and the time when the next scheduler will run.
SCHSTATUS: Stores the status of each run. (Only for regular schedulers)
SCHBRDCST: Stores the status of a job run in each instance (jvm) in a cluster. (Only for broadcast jobs)

Scheduler component can be enabled or disabled on a instance by setting the following component to true of false in wc-server.xml
com.ibm.commerce.scheduler.SchedulerComm

Scheduler can be configured using websphere commerce administration console. Using the tool will make an entry into SCHCONFIG and SCHACTIVE tables. We can also configure a scheduler by inserting into these tables using the insert SQL, SCHCONFIG for the details about the scheduler and type of scheduler, SCHACTIVE for the first run.

Each JVM instance runs the scheduler component, so this means any instance in the cluster can run the scheduled job. If the scheduler need to run only on a specific instance configure the SCCHOST of SCHCONFIG table with a specific value. Configure a JVM property with name as "com.ibm.commerce.scheduer.SchedulerHostName" and the value same as used in SCCHOST column of the SCHCONFIG table. This will make sure the scheduler is configured to run only on a single JVM.

How to configure a broadcast job to run at a specific intervals:
Step1- Configure a regular job to run at specific intervals of time and calls the command in step2.
Step2- Implement a command which reads the boolean property from request properties (if not available set as false). If the boolean property is false, configure a broadcast job who's name is same as the regular job(step1) and calls the same command(as in step1) by invoking AddBroadcastJobCmd with queryString property(request property) set to "booleanvariable=true".
If the boolean property is true implement the code to do the required functionality of the broadcast job.
This step creates a broadcast job with the column SCCQUERY of SCHACTIVE table set to a boolean property true. Now each JVM instance will read this broadcast job and execute on its JVM updating the SCHBRDCST table with the status that it has run on the JVM. There will be as many entries as the number of JVM's in the cluster.

How does Scheduler work
During the server startup, the SchedulerComm starts as a thread reading all scheduled jobs from SCHCONFIG table, this component is responsible for making sure the batch jobs are executed at configured time. It picks the configured job and adds and entry into SCHACTIVE table with time at which the scheduled job need to run. It then picks the entries from SCHACTIVE and executes the scheduled job.

Tuesday, January 4, 2011

Installing a Security Certificate in Websphere Commerce Developer Toolkit

1. Start WCS Server.
2. Start Administration Console by right clicking on the server and selecting 'Run Administartive Console' from Administration Context menu.
3. From the Admin Console window Expand Security and Select SSL Certificate & Key Mgmt


4. Click on SSL Configuration


5. Click on Node Default SSLSetting


6. Select Key Stores and Certificates


7. Select NodeDefaultTrustStored


8. Select Signer Certificates.


You can Select if you have the certification file or Select Retrieve from Port if you want to download the certificate.

Tuesday, December 21, 2010

Override isGeneric method in controller command

All commands try to create a new user object in the database, which in most cases is not required. To avoid loading of a user object we should override isGeneric method in the controller command and return a Boolean true. This will ensure that command will not end up spending time to create a user object, thus improving the performance of executing command..

Is the new command satisfying the following requirement.

- Command does not need to create a new user. (Ex: To View HomePage, ProductPage, search for product we don’t have to create user)
- Command does not access any user specific resources like Guest PII information or cart information. (Ex: ProductDisplay does not access users personal information, search doesn’t require to know the items in the cart)